In my PREVIOUS ARTICLE, I covered form state management and validation using only native React hooks useState and useEffect.
Today I shall cover a popular third-party library that simplifies state management and data validation in forms.
We'll use the same form as last time to demonstrate the pros and cons of both approaches where applicable in terms of User and Developer Experience.
const ReactHookFormFormStateManagementAndValidation = () => {
    return (
        <form>
            <h1>Form State Management using React Hook Form</h1>

            <label htmlFor="email">Email</label>
            <input type="text" placeholder="Email" id="email" />

            <label htmlFor="password">Password</label>
            <input type="text" placeholder="Password" id="password" />

            <button>Log In</button>
        </form>
    );
};

export default ReactHookFormFormStateManagementAndValidation;
React Hook Form simplifies the management of a form's data as well as increases code performance by reducing the number of re-renders.
It manages a form's state using the useForm hook, which returns an object with various properties and methods. Of the properties and methods, the most important ones for managing a form's state are:
register: This is a function to register form inputs with the form instance.handleSubmit: This is a function to handle form submissions.formState: This is an object containing the state of the form as a user interacts with it, including the values they key in, the errors, and whether the form is dirty or is submitting.
Getting Started with React Hook Form.
We start by installing the React Hook Form library and importing the useForm hook in our component containing the form.
npm install react-hook-form
We then destructure the three properties that I previously mentioned from useForm(). At this point, this is how our form component looks:
import { useForm } from 'react-hook-form';

const ReactHookFormFormStateManagementAndValidation = () => {
    const { register, handleSubmit, formState: {errors} } = useForm();

    return (
        <form>
            <h1>Form State Management using React Hook Form</h1>

            <label htmlFor="email">Email</label>
            <input type="text" placeholder="Email" id="email" />

            <label htmlFor="password">Password</label>
            <input type="text" placeholder="Password" id="password" />

            <button>Log In</button>
        </form>
    );
};

export default ReactHookFormFormStateManagementAndValidation;
Registering Form Inputs
As stated earlier, we use the register method to associate form inputs with the form instance. This allows React Hook Form to track changes and manage the state of each input.
This method allows you to register an input or select element and apply validation rules to React Hook Form. Validation rules are all based on the HTML standard and also allow for custom validation methods.
<input
    {...register('email')}
    type="text"
    placeholder="Email"
    id="email"
/>
Here, the email input is registered with the form. We do the same for the password input field.
Associating an input field using register automatically gives it access to onFocus, onBlur and name attributes. You don't need to define these again manually as we did in the previous article to ensure error messages were only displayed when an input field came into focus.
The register function takes an optional second argument which is an object of validation options. For example, if we want our email to be a maximum of 4 characters, we pass the maxLength validation as a second argument like this:
<input
    {...register('email', {
        maxLength: 4,
    })}
    type="text"
    placeholder="Email"
    id="email"
/>
The React Hook Form documentation details the different properties one can pass in the validation options object HERE, feel free to go over it. One of the properties of this object is pattern which takes a RegExp as its value.
We can pass the email and password Regex validations from the previous article here without needing to run a useEffect for each keystroke.
<input
    {...register('email', {
        pattern: /^[^\s@]+@[^\s@]+\.[^\s@]+$/,
    })}
    type="text"
    placeholder="Email"
    id="email"
/>
<input
    {...register('password', {
        pattern: /^(?=.*[a-z])(?=.*[A-Z])(?=.*[0-9])(?=.*[!@#$%]).{8,24}$/,
    })}
    type="text"
    placeholder="Password"
    id="password"
/>
Instead of triggering a re-render with each keystroke using a useEffect hook to test a user's input against our regex, the register method will set up the input field with the specified pattern. This allows a user's interaction with the form to be immediately validated against the regex pattern without the need for frequent re-renders of the form.
Handling Form Submission
The handleSubmit method will receive the form data if form validation is successful (if there was validation applied). It takes a callback that will be executed when the form is submitted and validates the inputs.
It also automatically prevents the default form submission behaviour so you don't need to invoke the preventDefault() function when submitting the form.
If we want to log the email and password captured in our form on submit, our code would look like this:
import { useForm } from 'react-hook-form';

const ReactHookFormFormStateManagementAndValidation = () => {
    const {
        register,
        handleSubmit,
        formState: { errors },
    } = useForm();

    const onSubmit = (data) => {
        console.log(data);
    };
    return (
        <form onSubmit={handleSubmit(onSubmit)}>
            <h1>Form State Management using React Hook Form</h1>

            <label htmlFor="email">Email</label>
            <input
                {...register('email', {
                    pattern: /^[^\s@]+@[^\s@]+\.[^\s@]+$/,
                })}
                type="text"
                placeholder="Email"
                id="email"
            />

            <label htmlFor="password">Password</label>
            <input
                {...register('password', {
                    pattern: /^(?=.*[a-z])(?=.*[A-Z])(?=.*[0-9])(?=.*[!@#$%]).{8,24}$/,
                })}
                type="text"
                placeholder="Password"
                id="password"
            />

            <button>Log In</button>
        </form>
    );
};

export default ReactHookFormFormStateManagementAndValidation;
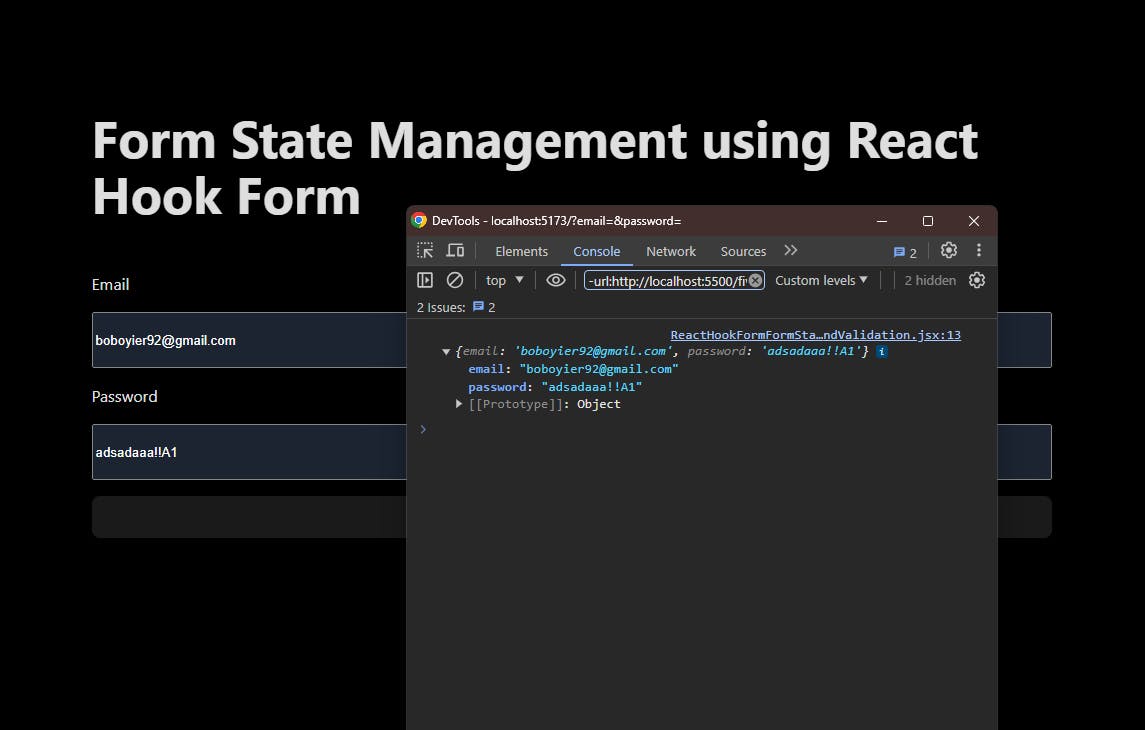
If we try to submit a form with invalid data, nothing will be logged on the console, and the input field with invalid data will automatically regain focus. This also eliminates the need to disable the submit button while the data is invalid, as clicking it triggers validation. However, if all the validation criteria are met, the data is logged on the console as shown below:

We observe that we captured the details as in the form but the fields were not cleared on submission. To clear all input fields, we also destructure the reset function from useForm and invoke it inside the handleSubmit's callback function onSubmit.
const onSubmit = (data) => {
    console.log(data);
    reset();
};
Accessing Form State
The formState object contains information about the entire form's state, helping you track the user's interaction with your application's form. You can access values, errors, and other properties to update your UI dynamically.
For example, we can use the errors property from formState to display a custom message if the form data is invalid.
To achieve this, you can access the specific input field within the errors object by its name, which corresponds to the name it was initialized with in the register function. Then, for each type of error, you can display a customized message.
Below is one way to do this:
<input
    {...register('email', {
            required: true,
            pattern: /^[^\s@]+@[^\s@]+\.[^\s@]+$/,
        })}
        type="text"
                placeholder="Email"
                id="email"
            />
{errors.email?.type === 'pattern' && <p>Email is not valid</p>}
{errors.email?.type === 'required' && <p>Email is required</p>}
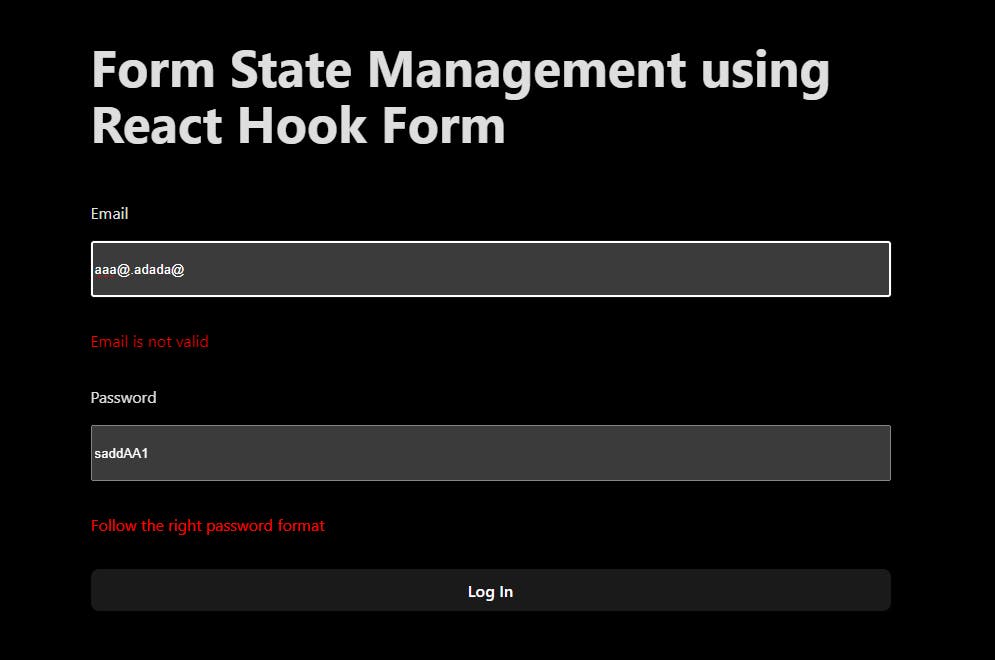
Now if we enter an incorrect password or email format, our UI should conditionally display the paragraph:

Our approach above has a minor limitation. We conditionally displayed a paragraph for each validation error captured in our form. For instance, if we had five validations for the password input field, our code related to just the password field would be quite verbose:
<label htmlFor="password">Password</label>
<input
    {...register('password', {
        required: true,
        pattern: /^(?=.*[a-z])(?=.*[A-Z])(?=.*[0-9])(?=.*[!@#$%]).{8,24}$/,
        minLength: 3,
        maxLength: 24,
    })}
    type="text"
    placeholder="Password"
    id="password"
/>
{errors.password?.type === 'pattern' && <p>Follow the right password format</p> }
{errors.password?.type === 'required' && <p>Password is required</p> }
{errors.password?.type === 'minLength' && <p>Password must be at least 3 characters</p> }
{errors.password?.type === 'maxLength' && <p>Password must not exceed 24 characters</p> }
While this code is functional, it does not adhere well to the DRY (Don't Repeat Yourself) principle and can lead to a suboptimal developer experience, especially when dealing with multiple input fields.
Instead of registering each input's validation with just a single value as we did before, React Hook Form allows us to register each with a validation message by returning an object instead of a primitive. Let's refactor the above password validation as follows:
<input
    {...register('password', {
        required: {
            value: true,
            message: 'Your password is required',
        },
        pattern: {
            value: /^(?=.*[a-z])(?=.*[A-Z])(?=.*[0-9])(?=.*[!@#$%]).{8,24}$/,
            message: 'Your password is not valid',
        },
        minLength: {
            value: 8,
            message: 'Password must be at least 8 characters',
        },
        maxLength: {
            value: 24,
            message: 'Password must not exceed 24 characters',
        },
    })}
    type="text"
    placeholder="Password"
    id="password"
/>
With this setup, we can replace this previous code:
{errors.password?.type === 'pattern' && <p>Follow the right password format</p> }
{errors.password?.type === 'required' && <p>Password is required</p> }
{errors.password?.type === 'minLength' && <p>Password must be at least 3 characters</p> }
{errors.password?.type === 'maxLength' && <p>Password must not exceed 24 characters</p> }
with this more concise one-liner which will track the user's interaction with our form and output the relevant message:
{errors.password && <p>{errors.password.message}</p>}
It works just the same:

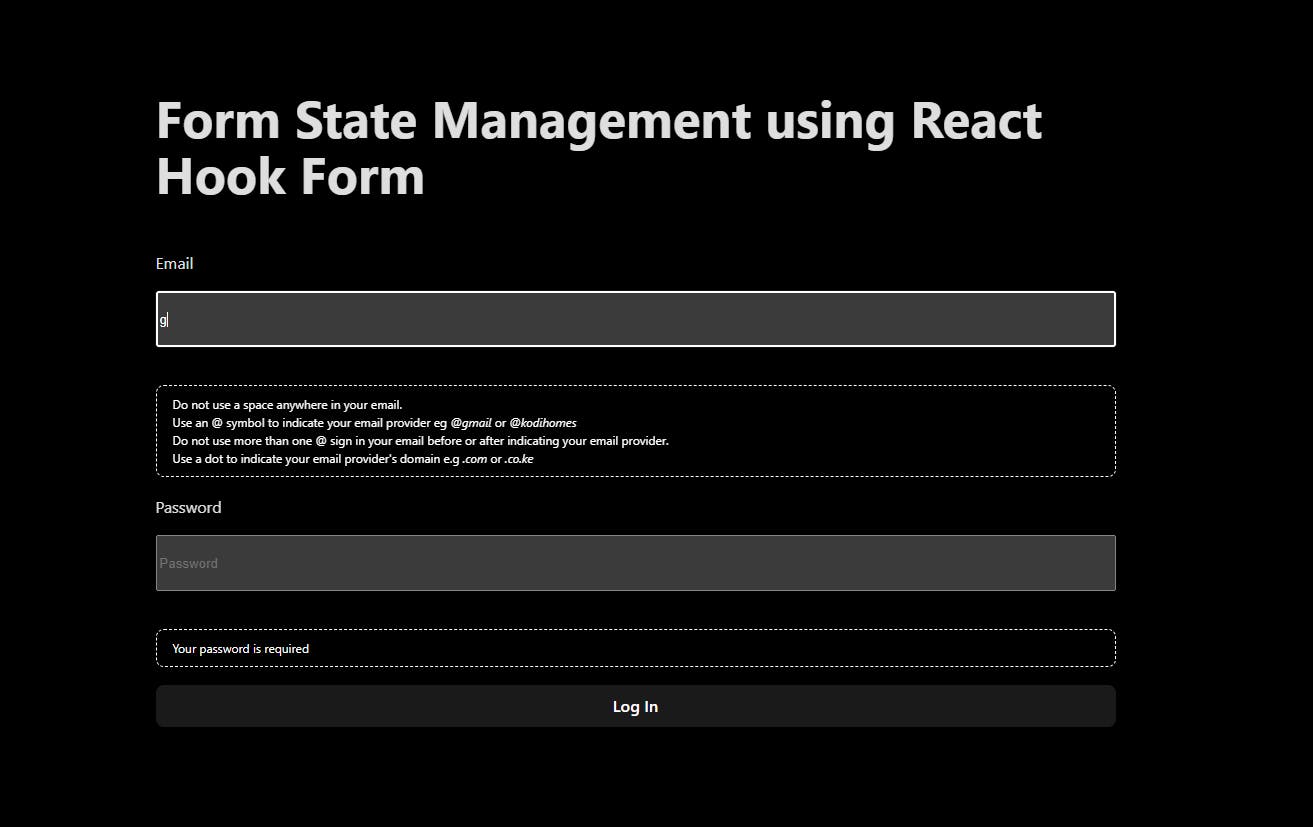
Let's refactor the email validation and demonstrate how to return an HTML element as a message instead of a string. This is particularly useful if you need to include more than just a single paragraph element in your error message, such as incorporating span elements, line breaks, or using strong and emphasis tags:
<label htmlFor="email">Email</label>
<input
{...register('email', {
required: {
value: true,
message: 'Your email is required',
},
pattern: {
value: /^[^\s@]+@[^\s@]+\.[^\s@]+$/,
message: (
<>
Do not use a space anywhere in your email.
<br />
Use an @ symbol to indicate your email provider eg{' '}
<em>@gmail</em> or <em>@kodihomes</em>
<br />
Do not use more than one @ sign in your email before or after
indicating your email provider.
<br />
Use a dot to indicate your email provider's domain e.g
<em>.com</em> or <em>.co.ke</em>
</>
),
},
})}
type="text"
placeholder="Email"
id="email"
/>
{errors.email && <p className="show-message">{errors.email.message}</p>}
With this, our form setup is complete. I wanted to ensure we finish this with our form looking exactly like the one we built in the previous walkthrough.

Conclusion
In this article, we explored how to effectively handle form state with React Hook Form. By leveraging its intuitive API and powerful features, we were able to streamline form development. We have explored how to register form inputs, handle submissions, and display validation errors.
Comparing React Hook Form with native form state validation and state management using useState and useEffect, we can identify several key differences:
Ease of Use: React Hook Form simplifies the process of managing form state and validation by providing a declarative API and built-in features like automatic validation and error handling. In contrast, native form state validation requires manual handling of input values and validation logic, which can be more cumbersome and error-prone.
Performance: React Hook Form is designed for optimal performance, with built-in optimizations such as memoization and minimal re-renders. This can lead to improved performance compared to manually managing form state with
useStateanduseEffect, especially in complex forms with many inputs.Developer Experience: React Hook Form offers a superior developer experience with its intuitive API, clear documentation, and community support. Developers can quickly get up to speed with React Hook Form and leverage its features to build robust forms with minimal effort. In contrast, managing form state with
useStateanduseEffectrequires more boilerplate code and may be less intuitive for developers, especially those new to React.
Overall, React Hook Form provides a powerful and efficient solution for managing form state and validation in React applications. Its ease of use and performance optimizations make it a preferred choice for building dynamic and interactive forms.
In the next, and final, installment of this series, we'll utilize this form to demonstrate how we can integrate a third-party validation library, Yup. This approach will shift the validation responsibility away from React Hook Form, allowing it to focus on its primary strength: form state management.
By doing so, we'll significantly reduce the amount of logic embedded in our JSX, where we're currently handling input field validation.
I hope you enjoyed this article. Feel free to like and leave a comment below.
Happy coding!! 😊
